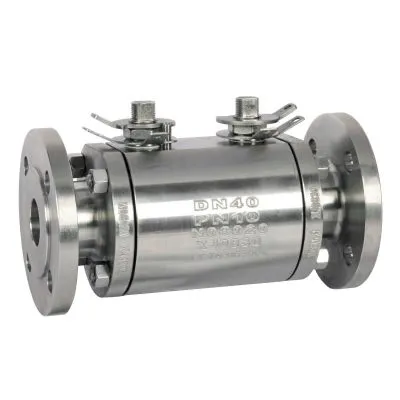
The problems existing in the tooling for strength and sealing performance tests of high-pressure valves are analyzed, and the structural characteristics, working principles and performance of the new type of testing tooling designed based on the principle of O-ring sealing are introduced in this article.
1. Overview
The high pressure valve must be subjected to a strength test and a sealing performance test before leaving the factory. Frequent use of test tooling and high pressure of test medium lead to damages such as deformation and scratches on the tooling connectors, resulting in unstable test pressure. The product cannot maintain normal pressure, leading to test failures, increased test costs, and a waste of manpower and material resources. A tooling with easy disassembly and assembly, stable sealing performance, and low maintenance costs is designed because of the test.
2. The analysis of the problem
2.1 Structure
The sealing structure of the inlet and outlet ends of the valve and the pressure test joint is a commonly used conical surface and spherical surface contact. The arc surface of the front end of the joint is in contact with the conical surface of the inlet and outlet of the valve body to form a sealing line. The threaded connection between the outer nut and the inlet and outlet of the valve provides pre-tightening force to compress the joint and play a sealing role. In the process of repeated tests, the joint is constantly deformed under pressure, and the sealing line becomes a face sealing. The pre-tightening force of the sealing is getting greater and greater. The sealing part of the joint is severely deformed, and the sealing fails, which must be replaced.
During the test, a valve with a diameter less than 10 mm is easy to form a seal with a joint, and it is used more times for disassembly and assembly. When the valve diameter is greater than 15 mm, the sealing effect is poor. For a valve with a diameter of 32 mm, when the test pressure reaches 35MPa, the sealing effect is the worst. If the new joint is used several times, there will be leakage at the sealing surface, and the joint must be replaced. Perform the test again. If you arbitrarily increase the tightening force acting on the outer nut, the outer nut and the thread of the valve body are prone to deformation, and in severe cases, the thread will be stuck, resulting in the valve body being scrapped. The valve body is made from stainless steel 2Cr13 or 1Cr18Ni9Ti and the material and processing costs are relatively high.
2.2 Materials
The contact surface of the joint and the valve body will deform under the action of the tightening force. In order to reduce the deformation of the valve body's contact surface, the hardness of the joint material should not exceed the valve body. When the joint material is different, the effect of the use is also different.

The material of stainless steel joint is generally 1Cr18Ni9Ti or 0Cr18Ni9, and its hardness is close to the valve body. After the test, the sealing part of the joint and valve body deform at the same time, and indentation will generate for the sealing surface of the valve body, which is not conducive to multiple sealing. In the process of rotating and tightening the outer nut, if the joint and the outer nut rotate together, the sealing surface of the valve body of the product will be damaged. After the joint is used many times, the sealing line will become wider, which is prone to external leakage. If the tightening force is forcibly increased, it is easy to damage the thread connection of the valve body, causing the product to be repaired or scrapped.
(2) Brass
The brass adopted for the joint is generally H62, its hardness is lower than the valve body. After the test, the joint deforms greatly, but it generally does not damage the sealing surface of the valve body. It is easier to seal in the early stage. After multiple use, the sealing line of the joint is easy to widen, forming a face seal, and the required tightening force will also increase. Brass joints cannot be used multiple times.
(3) Aluminum bowls or copper bowls
In order to improve the service life of the joint and reduce the screw's tightening force, a thin aluminum bowl or a thin copper bowl is clamped between the sealing surface of the joint and the valve body. The aluminum bowl's material is pure aluminum L2, and annealing treatment reduces the hardness of the material. Aluminum bowls are generally used in pipeline connections. They are cone-shaped and have the same outer diameter as the valve cone; the thickness is 1.5 mm. In the test, the initial sealing performance of the aluminum bowl is good and the sealing surface will not be damaged. However, after repeated use, the deformation is great and the sealing performance is getting worse and worse, requiring frequent replacement. This method is not suitable for valves with large diameters.
5. Conclusion
The test tooling designed by using the O-ring has a good sealing effect in actual work and is easy to disassemble and assemble, so that the sealing surface of the product is not easily damaged in various tests, avoiding repairs and waste, which fully meets the requirements of various performance tests and save production costs.
1. Overview
The high pressure valve must be subjected to a strength test and a sealing performance test before leaving the factory. Frequent use of test tooling and high pressure of test medium lead to damages such as deformation and scratches on the tooling connectors, resulting in unstable test pressure. The product cannot maintain normal pressure, leading to test failures, increased test costs, and a waste of manpower and material resources. A tooling with easy disassembly and assembly, stable sealing performance, and low maintenance costs is designed because of the test.
2. The analysis of the problem
2.1 Structure
The sealing structure of the inlet and outlet ends of the valve and the pressure test joint is a commonly used conical surface and spherical surface contact. The arc surface of the front end of the joint is in contact with the conical surface of the inlet and outlet of the valve body to form a sealing line. The threaded connection between the outer nut and the inlet and outlet of the valve provides pre-tightening force to compress the joint and play a sealing role. In the process of repeated tests, the joint is constantly deformed under pressure, and the sealing line becomes a face sealing. The pre-tightening force of the sealing is getting greater and greater. The sealing part of the joint is severely deformed, and the sealing fails, which must be replaced.
During the test, a valve with a diameter less than 10 mm is easy to form a seal with a joint, and it is used more times for disassembly and assembly. When the valve diameter is greater than 15 mm, the sealing effect is poor. For a valve with a diameter of 32 mm, when the test pressure reaches 35MPa, the sealing effect is the worst. If the new joint is used several times, there will be leakage at the sealing surface, and the joint must be replaced. Perform the test again. If you arbitrarily increase the tightening force acting on the outer nut, the outer nut and the thread of the valve body are prone to deformation, and in severe cases, the thread will be stuck, resulting in the valve body being scrapped. The valve body is made from stainless steel 2Cr13 or 1Cr18Ni9Ti and the material and processing costs are relatively high.
2.2 Materials
The contact surface of the joint and the valve body will deform under the action of the tightening force. In order to reduce the deformation of the valve body's contact surface, the hardness of the joint material should not exceed the valve body. When the joint material is different, the effect of the use is also different.

The material of stainless steel joint is generally 1Cr18Ni9Ti or 0Cr18Ni9, and its hardness is close to the valve body. After the test, the sealing part of the joint and valve body deform at the same time, and indentation will generate for the sealing surface of the valve body, which is not conducive to multiple sealing. In the process of rotating and tightening the outer nut, if the joint and the outer nut rotate together, the sealing surface of the valve body of the product will be damaged. After the joint is used many times, the sealing line will become wider, which is prone to external leakage. If the tightening force is forcibly increased, it is easy to damage the thread connection of the valve body, causing the product to be repaired or scrapped.
(2) Brass
The brass adopted for the joint is generally H62, its hardness is lower than the valve body. After the test, the joint deforms greatly, but it generally does not damage the sealing surface of the valve body. It is easier to seal in the early stage. After multiple use, the sealing line of the joint is easy to widen, forming a face seal, and the required tightening force will also increase. Brass joints cannot be used multiple times.
(3) Aluminum bowls or copper bowls
In order to improve the service life of the joint and reduce the screw's tightening force, a thin aluminum bowl or a thin copper bowl is clamped between the sealing surface of the joint and the valve body. The aluminum bowl's material is pure aluminum L2, and annealing treatment reduces the hardness of the material. Aluminum bowls are generally used in pipeline connections. They are cone-shaped and have the same outer diameter as the valve cone; the thickness is 1.5 mm. In the test, the initial sealing performance of the aluminum bowl is good and the sealing surface will not be damaged. However, after repeated use, the deformation is great and the sealing performance is getting worse and worse, requiring frequent replacement. This method is not suitable for valves with large diameters.
5. Conclusion
The test tooling designed by using the O-ring has a good sealing effect in actual work and is easy to disassemble and assemble, so that the sealing surface of the product is not easily damaged in various tests, avoiding repairs and waste, which fully meets the requirements of various performance tests and save production costs.
Next: Use and Maintenance of Ball Valves Used for Gas Pipes
Previous: Different Kinds of Valves

